In this article, we’ll look at how you can create an image editor that will play back directly in any modern browser. No plugins required, no App Stores required – the result is pure HTML5. This includes desktops, tablets – even mobile phones. These examples work in Safari, Chrome, iPad, Android, Opera, FireFox, and IE10 and above.
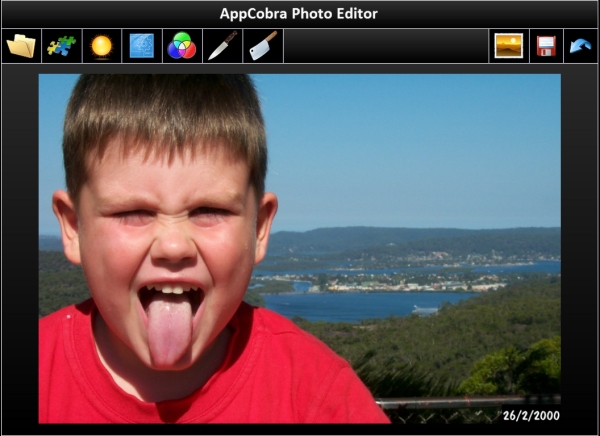
An example, using the techniques in this article, can be seen at http://www.appcobra.com/x/KS2/AppCobraPhotoEditor/. You’ll find links to other examples at the end of this article.
We’ll be using AppCobra to illustrate how easy this is. It requires at least version 10.9.40 – which was uploaded on 2nd March, 2013. You can download a trial at http://www.appcobra.com/ipaddownloads.htm.
We’ll provide the examples online and also provide the AppCobra projects so you can create and modify your own. You’ll find these links at the end of the article.
AppCobra is the world’s premier HTML5 editing tool for mobile and HTML5 browser apps. After this article, you’ll see why. And is this article, we only scratch the surface of its power.
Loading an Image
In the photo editor you’ll be creating, you allow the user to load their own image. Let’s see how this part is done.
To set up an image load button, first use AppCobra to create a button or some other object to attach an event or interaction to.
Second, you need to create or add an image, or a hotspot to the app. This object you create is where the photograph the user loads from their machine will appear. If you want some sort of a placeholder image, add an image. If you want an invisible area, add a hotspot. Take a note of the alias this object has – you’ll need this in a moment.
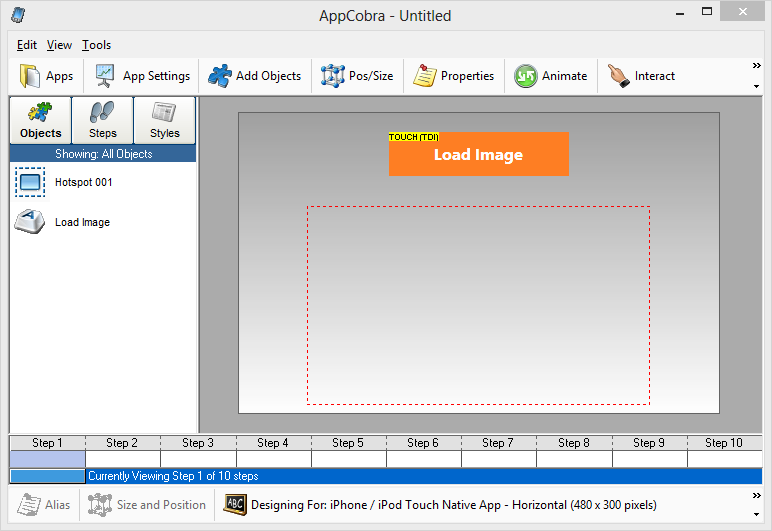
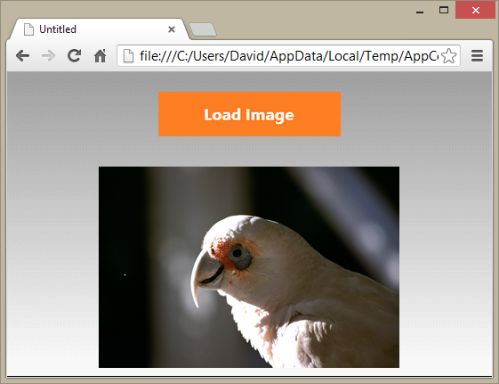
Below, your canvas may look something like this:
Next, select the button you created initially (which we’ve labelled Load Image, above), which will allow the user to select a photograph, and select the Interact / All Events command.
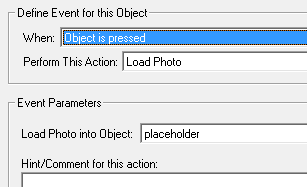
In this dialog box that appears, select the Load an Image option from the Perform This Action listbox.
When you do this, a list below this action will appear, called Load Photo into Object. From this list, select the name of the image or hotspot you created above to display the photo the user loads.
Above, we selected an object called placeholder. Below, you can see how we have set up our canvas in AppCobra – the button at the top, and the hotspot below, where the image will appear.
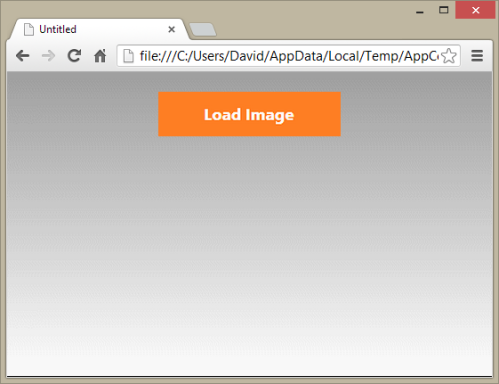
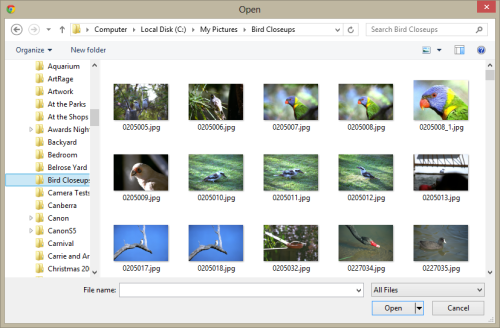
From here, that is all you need to do. When you preview or run this app, when the user selects the Load Photo button, they will be able to select a photo from their local machine, or device.
Once the image is loaded, you can do what you want with it. To edit the image, however, it needs to be transferred to a canvas object.
To create a canvas object, select the Add Objects / Full List / Canvas Object command. Then draw the canvas object onto the AppCobra canvas.
To transfer the image into the canvas object, some code needs to be executed. The code to execute is this:
imagetocanvas(theimage, thecanvas)
where theimage is the name of the object where the user loaded image appears, and thecanvas is the name of the canvas object that will be used for editing.
There are two ways you can do this.
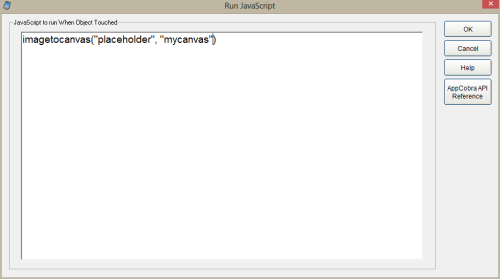
First, add another button. Then, select the Insert / Run JavaScript Code command.
In the dialog box that appears, enter the following text:
imagetocanvas(theimage, thecanvas)
When the user selects this button, the image will be copied from the theimage object, to the thecanvas object, and will appear there. In the case above, the image in the object called “placeholder” will be transferred to the canvas object called “mycanvas“.
There is another way this can done, automatically.
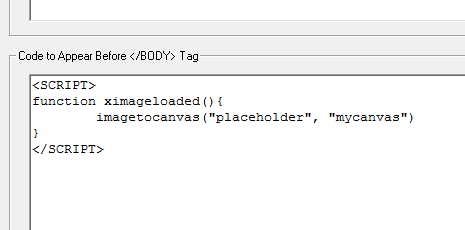
Whenever an image is loaded by the user, a JavaScript routine called ximageloaded() is run. Normally, this does nothing, but you can add this code, using the App Settings / Includes command, as you can see below:
Using this technique means the image is transferred to the canvas object automatically, straight after the user loads the image.
If you wish, you can even make the original image not visible (by putting it on a different step, or putting it into a group that is not initially visible).
Editing the Image
Once the image is in a canvas object, the following routines can be run, using the Insert / Run JavaScript Code command.
canvasgreyscale(canvas, left, top, width, height)
Where canvas is the name of the canvas object. Turns the image in the canvas to a grayscale image. Optionally, left, top, width, and height can be added to determine a target area in the canvas where the effect is applied.
canvasbrighten(amount, canvas, left, top, width, height)
Where canvas is the name of the canvas object. Brightens the canvas by amount. Can be negative to darken the image. Optionally, left, top, width, and height can be added to determine a target area in the canvas where the effect is applied.
canvassaturate(amount, canvas, left, top, width, height)
Where canvas is the name of the canvas object. Saturates (increases color) the canvas by amount. Can be negative to desaturate the image. Optionally, left, top, width, and height can be added to determine a target area in the canvas where the effect is applied.
canvascontrast(amount, canvas, left, top, width, height)
Where canvas is the name of the canvas object. Increases contrast of the image in the canvas by amount. Can be negative to lower contrast in the image. Optionally, left, top, width, and height can be added to determine a target area in the canvas where the effect is applied.
canvasrgb(r, g, b, canvas, left, top, width, height)
Where canvas is the name of the canvas object. Increases or decreases the red, green and/or blue components of the image in the canvas by r, g and/or b. Optionally, left, top, width, and height can be added to determine a target area in the canvas where the effect is applied.
canvassharpen(amount, canvas, left, top, width, height)
Where canvas is the name of the canvas object. Sharpens the image in the canvas by amount. Amount in this case can be 1 to 5. Optionally, left, top, width, and height can be added to determine a target area in the canvas where the effect is applied.
addimagetocanvas(theimg,thecanvas,left,top,width,height, alpha, rotate)
Allows to add another image to the image already in the canvas. theimg is the source image to add, thecanvas is the canvas with the image in it. Left, top, width, and height determine where the image appears. Alpha, from 0 to 1, is the transparency of the new image, and rotate is the angle of the image to add.
Saving the Edited Image
There are actually a number of ways to save the image – or rather, let the user save the image locally. You can execute this code:
savecanvas(canvas, thestring)
This will pop up a message box, with the text thestring. The image in canvas will be saved. The user will have to make a selection for the image to be saved.
Other Image Routines
Other routines that can be run include:
canvastoimage(canvas, image)
Copies an image from the canvas into an image.
canvastocanvas(fromcanvas, tocanvas, left, top, width, height, targetleft, targettop)
Copies an image from one canvas to another. left, top, width, and height determine what part of the source canvas is copied, and targetleft and targetright are the target coordinates.
trimimage(image,left,top,width,height)
Crops an image using the coordinates given.
resizeimage(image,width,height)
Resizes image to width and height.
imagetoimage(image1,image2)
Copies an image from image1 to image2.
getcanvascontext(canvas)
Returns the context of the canvas for when you want to manually edit the canvas.
showloader(overob)
Shows a loader object directly and centered over the overob object.
saveimagelocal(canvas,localname)
Saves the image in the canvas canvas to a local file called localname. Note that this is saved in the apps sandbox, and can only be accessed by your app.
loadimagelocal(localname,target)
Loads the image localname in the image object target. You cannot load just any file in this manner – only an image you saved previously using the saveimagelocal command.
Examples
See these examples:
This example is at the most simple – let’s the user load an image: http://www.appcobra.com/x/KS2/LoadinganImage/ (get AppCobra source project here)
This example goes one step further – loads the image, and then lets the user transfer the image to the canvas: http://www.appcobra.com/x/KS2/LoadinganImage2/ (get AppCobra source project here)
This one puts it all together. Loads the images, transfers to the canvas, let’s the user edit the file, and finally, saves it: http://www.appcobra.com/x/KS2/LoadinganImage3/ (get AppCobra source project here)
This example lets you load an image (and it loads the image straight to the canvas), and then select a border for that image. Also shows an alternate save method: http://www.appcobra.com/x/KS2/LoadinganImage4/ (get AppCobra source project here)
This example lets you load an image (and it loads the image straight to the canvas). It further allows you to combine other images on the canvas – with random positioning, transparency, and rotation: http://www.appcobra.com/x/KS2/LoadinganImage5/ (get AppCobra source project here)
In this example, we allow the user, after loading an image, to determine exactly where the grayscale effect can be applied on the loaded image: http://www.appcobra.com/x/KS2/LoadinganImage6/ (get AppCobra source project here)
Here is an advanced example: http://www.appcobra.com/x/KS2/AppCobraPhotoEditor/

